Creating a Mailbox
For creating a mailbox, you need to be logged into CloudMail administration as a user with domain admin rights or higher.
Setup
In the "domains" tab, select (or create and then select) the domain under which you want to create a mailbox:

Buttons for adding a mailbox or alias will then appear on the right

Alternatively, in the "domains" tab, you can use the buttons in the right part, in the actions column:
-
edit
-
add e-amail alias
-
add mailbox

Fill in all the necessary information: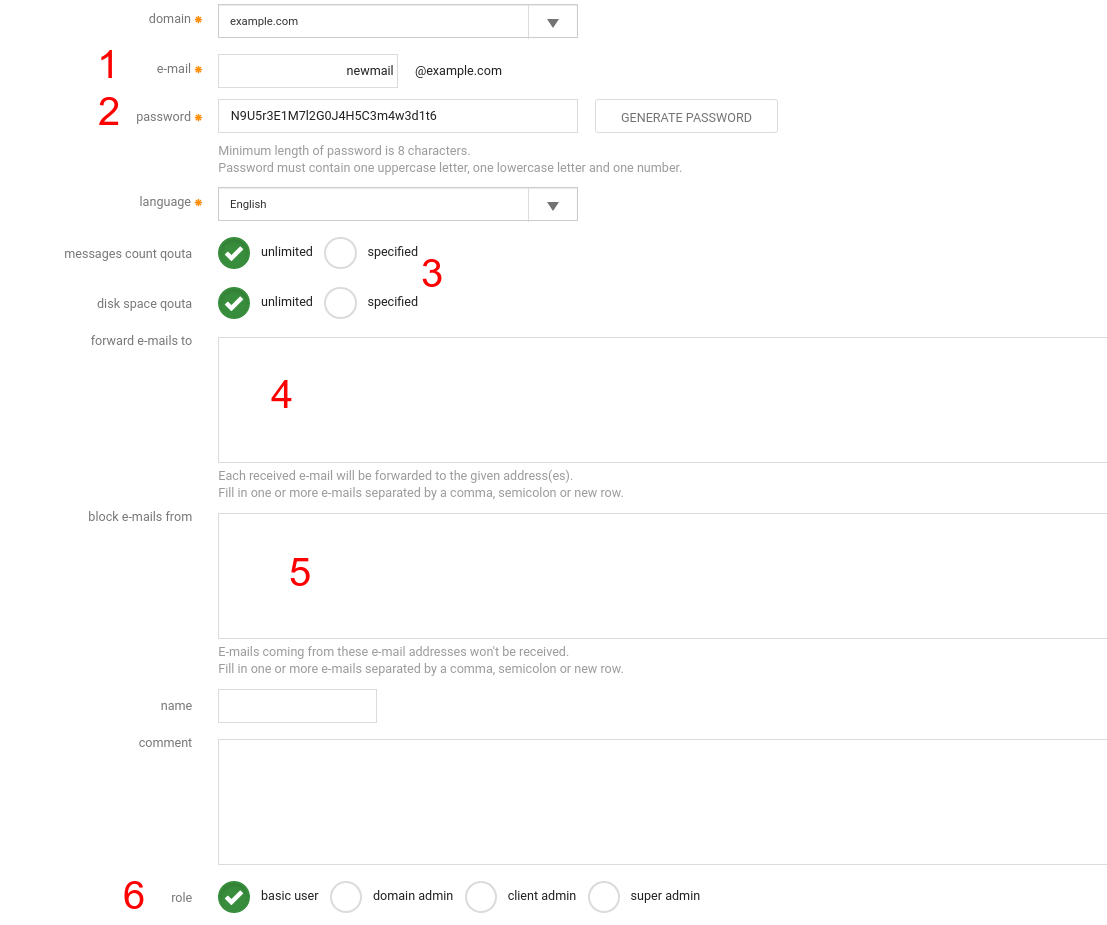
- Mailbox name.
- Enter the password here. You can enter your own password or use a generator. For custom passwords, we recommend to use at least 8 characters containing uppercase and lowercase letters, numbers and optimally at least one special character. This will make it difficult to break into your mailbox.
- Quota settings for the number of messages and used disk space. Quotas are part of parent quotas, which are used for a domain. The total size of the allocated quotas for all mailboxes can not exceed the total quota for the domain.
- Here you can set up forwarding of received emails to other addresses.
- Configure blocking of unwanted senders.
- Type of account and its role (see below).
Finally, confirm by clicking the button: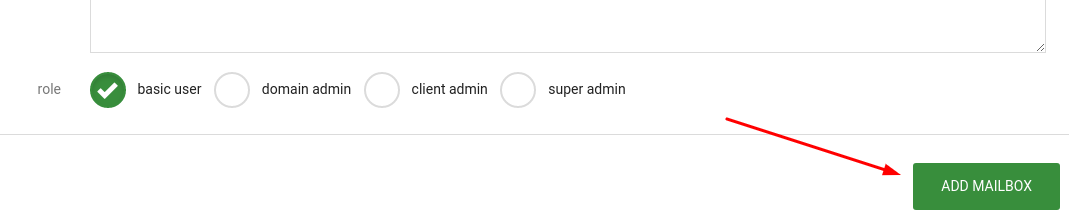
Mailbox roles
The newly created mailbox can be assigned one of the following roles, ranging from the highest privileges to the lowest:
- client admin - can create, delete, and change settings on all domains on the account
- domain admin - manages mailboxes within a specific domain and cannot see or manage other ones
- basic user - the owner of the mailbox, who can only change its settings
Every administrator can create an account with the same or lower role as themselves.