Restricting access using HTTP basic authentication
If you have information on your website that is sensitive or restricted to a small group of people, you can make sure that only authorised people can see it by restricting access based on username and password. To set up authorization, you first need to create a password file, which should be placed in a location that is not accessible from the site to prevent it from being leaked.
Preparing the .htpasswd file
Use the password file creation tool to create the username/password combination (for example, using the htpasswd command from the apache2-utils package). This utility is installed by default on all servers running Apache HTTP Server, but if you can't find it on your server, we can install it on your request via a ticket. Online tools can also be used to generate a username/password combination, but we do not recommend this for security reasons.
-
Run the htpasswd tool with the
-cflag (to create a new file), with the file path name as the first argument and the username as the second argument:htpasswd -c /var/www/<username>/.htpasswd <username> -
Press Enter and at the following prompt, type the password for the selected user. If you choose a different directory than in the previous example, make sure your user (mgtools) has write permissions to the directory you selected.
-
If you wish to add multiple users, omit the
-cargument from the previous example, since the file already exists:htpasswd /var/www/<username>/.htpasswd <username> -
You can verify the addition of the username/password combination to the file with the
catcommand:cat /var/www/<username>/.htpasswd
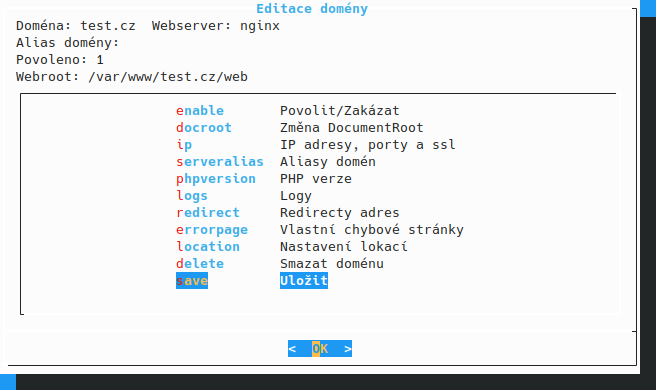
Adding the .htpasswd file to the configuration in Managed Tools
-
After starting the application via SSH, enter the
mgtools-tuicommand. Select the webserver module from the module menu, depending on the server configuration. HTTP authorization can be enabled for both nginx and Apache HTTP Server with nginx as a reverse proxy.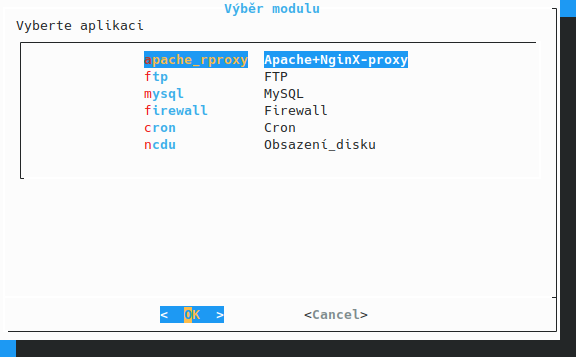
-
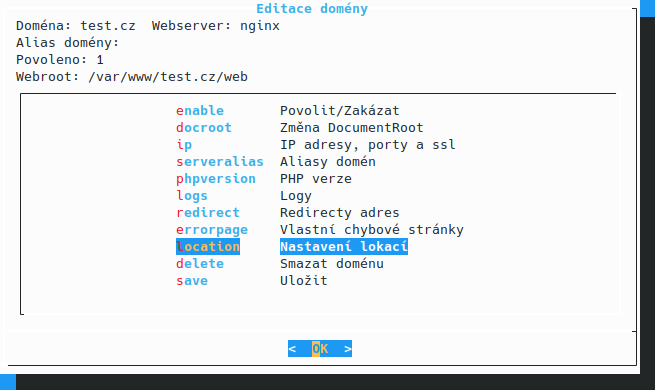
Select the virtualhost for which you want to enable HTTP basic authentication. In our case, this is VirtualHost test.cz.

-
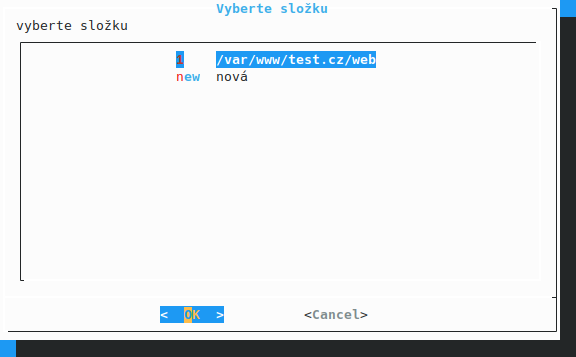
In the virtualhost settings, select location or directory from the menu.
-
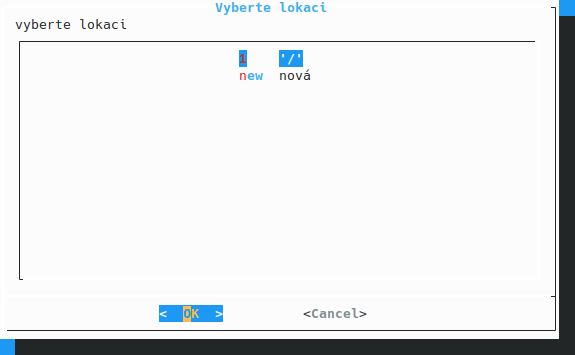
Now select the directory for which you wish to set HTTP authorization. If the directory is not in the list, add it using the new option.
-
Select the authname parameter and choose a one-word name for it to restrict access (e.g.
Restricted) and confirm with Enter. Setting the parameter tooffor not specifying the parameter will disable HTTP authentication.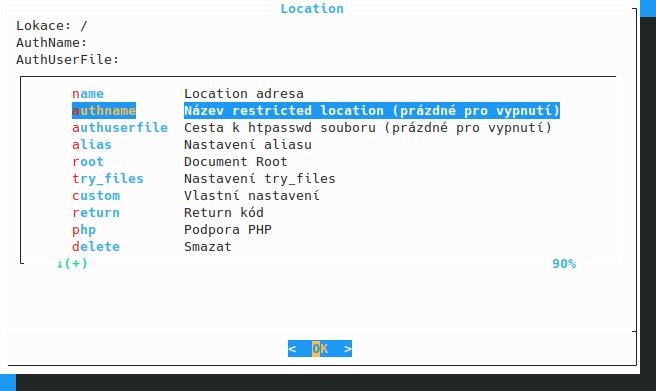
-
Next, select the authuserfile parameter to specify the full path to the .htpasswd file (from the previous example, e.g.
/var/www/<name>/.htpasswd, and confirm with Enter.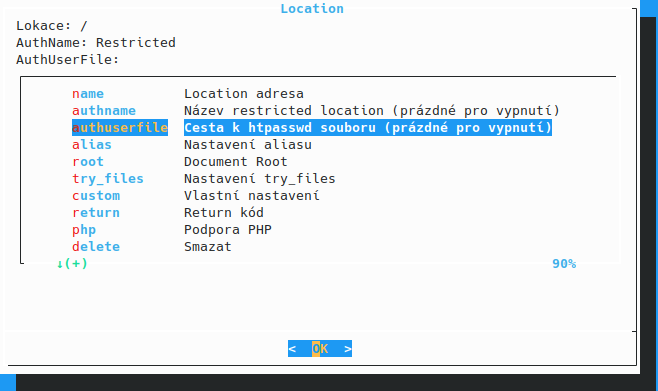
-
Return to the domain configuration by selecting back and save the changes (save). Now the basic HTTP authentication for the location you specified is set up.