Configuring Email Filters in Cloudmail
Since the upgrade of the Cloudmail service in February 2018, it is possible to filter emails on the server side.
In the current implementation, the functionality limited to the Roundcube web interface; the RainLoop email interface is not supported. Support for remote administration using the Managesieve standard is currently not implemented.
Configuration steps
- To set up a custom filters, please log in to your mailbox at https://webmail.vshosting.cloud/roundcube.
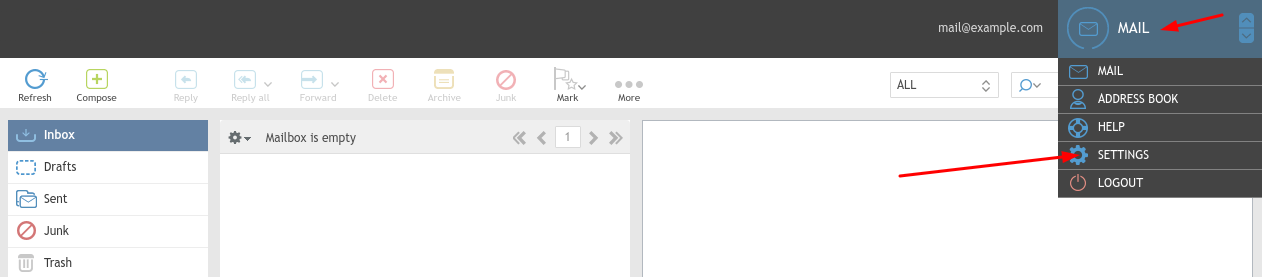
- Then use the "MAIL" icon in the upper right corner and then select the "SETTINGS" option.
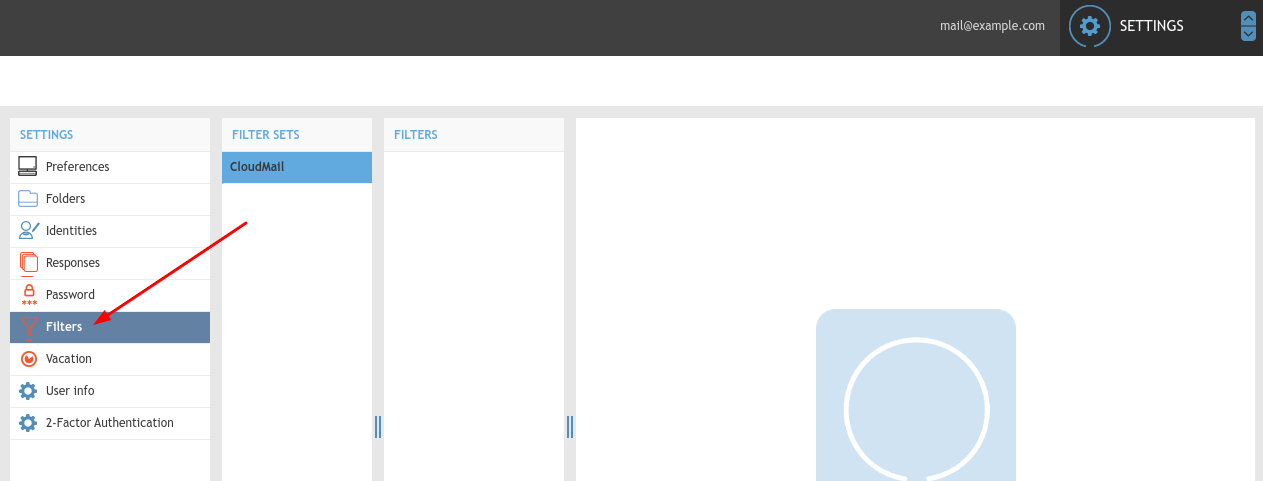
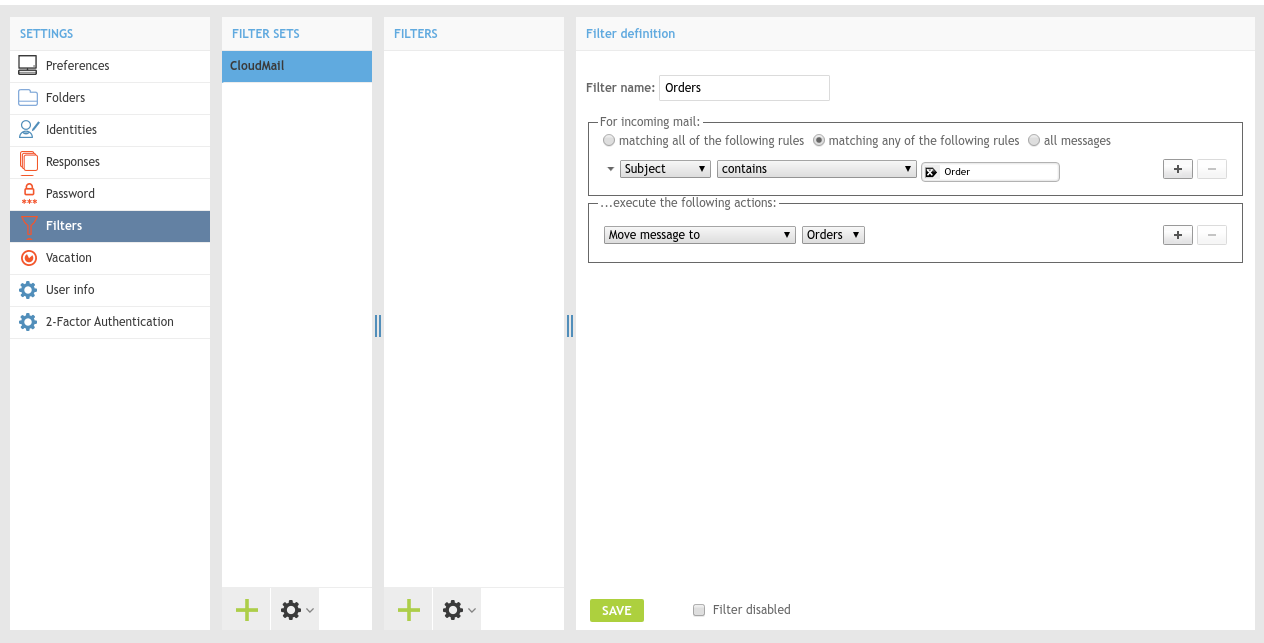
- Select "Filters" in the menu on the left. The displayed columns show existing filters with the option to edit them.
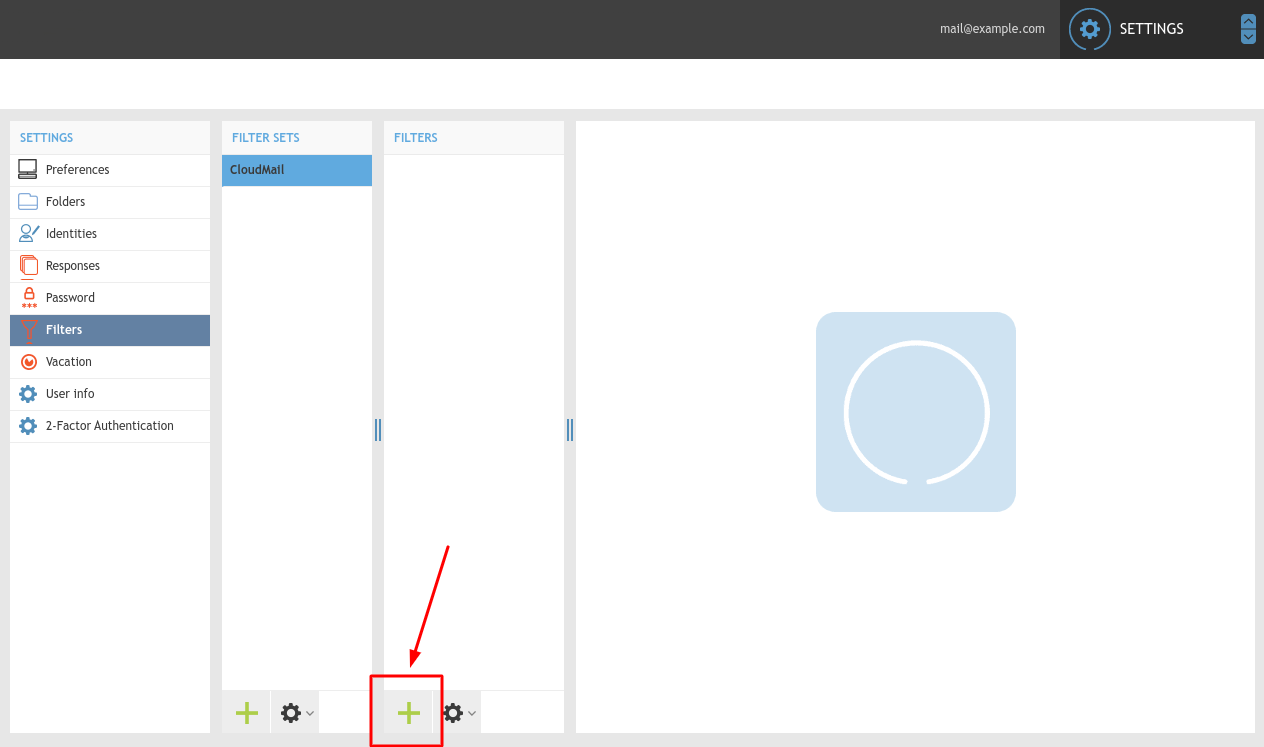
- To create a new filter, click on the add icon (plus)
- Here is an example of a filter, which moves email to a selected folder according to the subject of the message.
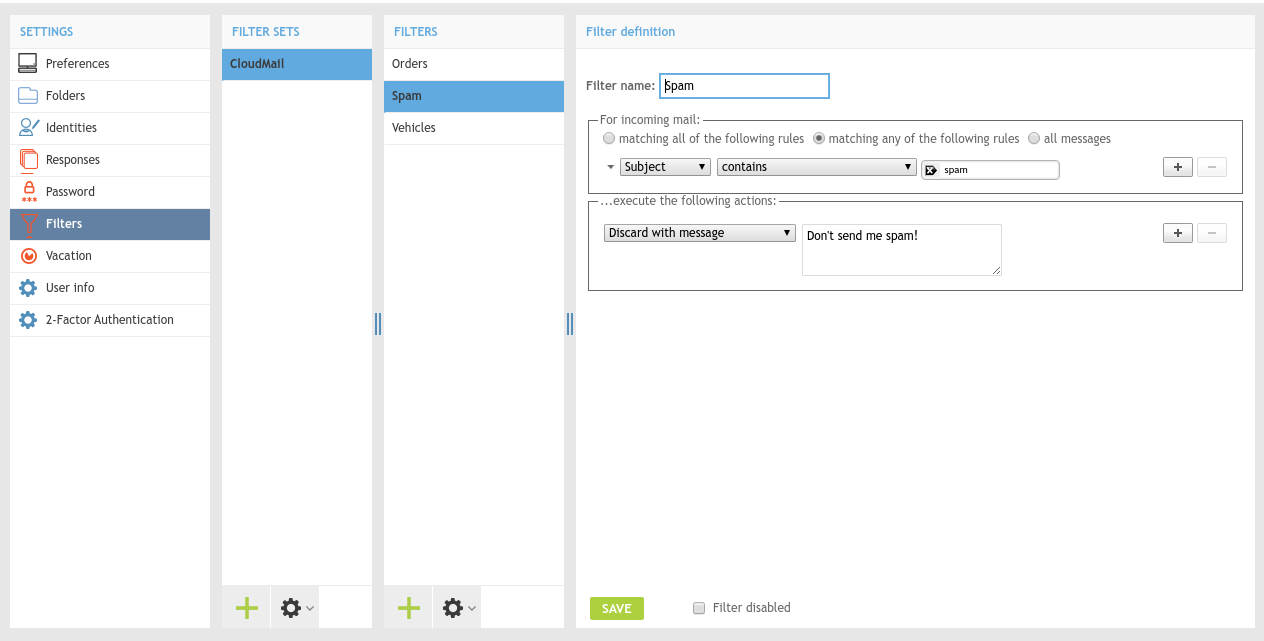
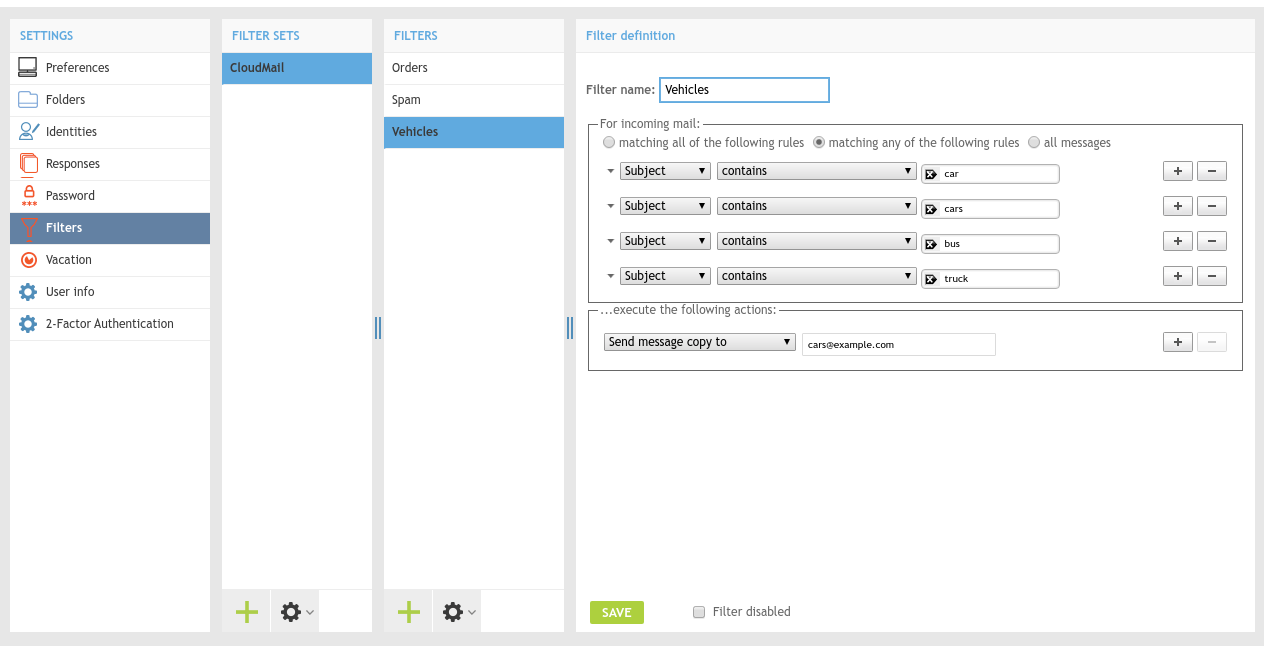
- You can have multiple filters, as you can see in the following screenshots:
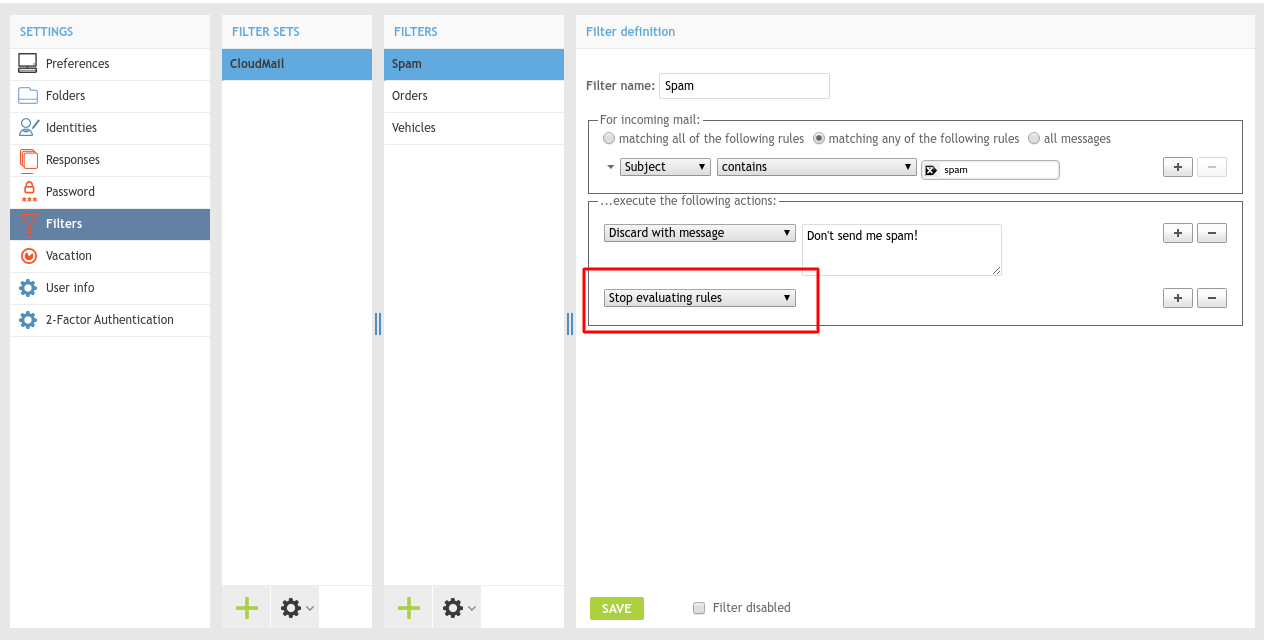
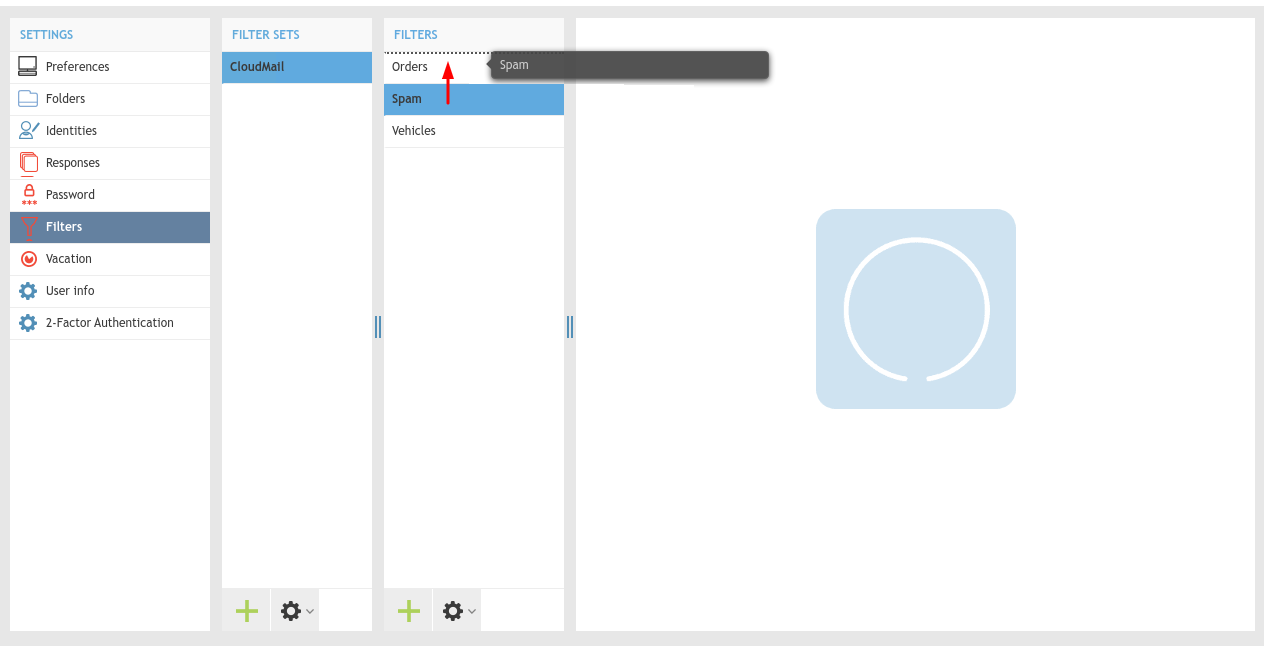
- In this case, the filters are evaluated one-by-one from top to bottom. So it is always necessary to pay attention to the order of filters. In our chosen order, even unwanted spam messages would be moved to the "Orders" folder. The order of the filters can be changed by dragging with mouse:
- If you do not want following filters to be evaluated after applying a certain filter, you can set the “Stop evaluating rules” option: